
Get started with ThinkScribe on Mac
Install ThinkScribe on your Mac, grant the two permissions it needs, and make your first voice typing, recording and file import in about five minutes.
By the end of this guide ThinkScribe will be installed on your Mac, it will have the two permissions it actually needs, and you will have done the three things the app is for: typed a sentence with your voice into another app, recorded and transcribed something, and imported a file. Nothing you do here sends audio anywhere. Every step runs on your Mac.
Install and open the app
- Open the Mac App Store and search for ThinkScribe, or use the download button at the bottom of this page.
- Click Get, then Open. ThinkScribe needs a Mac with Apple Silicon (M1 or later) on a current version of macOS; the on-device speech and AI models are built for it.
- The first launch shows a short welcome tour. You can go through it now or click Skip Setup and come back to it later from Help > Welcome Guide… in the menu bar.
There is no account to create and nothing to sign in to. If you already use ThinkScribe on an iPhone or iPad, the same purchase covers your Mac.
Grant the two permissions
ThinkScribe asks for exactly two permissions during the welcome tour, both on the Permissions step:
- Microphone: used to record your voice for transcription and voice typing. Click Continue next to Microphone and allow it in the macOS prompt.
- System Audio: used to capture the sound coming out of other apps, so a Zoom, Teams or FaceTime call can be recorded with both sides. Click Continue and allow it. This is a standard macOS permission; there is no virtual audio driver to install.
Each row shows Granted once macOS has confirmed it. You can review both later under Settings > Permissions inside the app.
Choose where your transcripts live
The Your Data, Your Choice step offers two cards:
- On This Mac Only: everything stays on this Mac. Nothing is copied to iCloud, which also means it cannot be recovered if you delete the app.
- iCloud Sync: transcripts, summaries, collections and speaker names sync to your iPhone and iPad through your own iCloud account, and survive a reinstall.
Pick whichever fits how you work. It is a toggle, not a commitment; you can change it any time under Settings > Transcription > iCloud Sync. Audio recordings are not synced by either choice unless you also turn on Sync Audio to iCloud. The sync guide explains exactly what moves and what stays.
Let the speech models download in the background
The Transcription Ready step tells you that Apple Speech is built into your Mac and works immediately. Below it, ThinkScribe starts downloading two optional on-device engines in the background:
- Transcription Engine (Parakeet): faster and more accurate for most European languages, and the engine ThinkScribe recommends once it is installed.
- ThinkScribe AI: the local language model behind summaries, action items and the chat assistant.
You do not need to wait. Click Continue and the downloads finish while you use the app. Their progress and the option to remove them later are under Settings > AI & Models > Manage Models.
Your first voice typing
- Open any app with a text field: Mail, Notes, Slack, a browser.
- Click into the field so the cursor is blinking there.
- Press Option-Space. A small floating bar appears and reads Listening… tap to stop.
- Say a sentence, then press Option-Space again. The text lands at your cursor.
If you would rather cancel than insert, press Escape while the bar is listening. The voice typing guide covers changing the shortcut, the floating bar versus the menu bar icon, and the Professional, Shorten and AI Prompt rewrite chips.
Your first recording
- In ThinkScribe's main window, look at the record bar at the top. It has a Microphone toggle on one side, a System audio toggle on the other, and the Record button in the middle.
- Leave Microphone on and press Record, or press Command-R.
- Talk for twenty seconds, then press the button again to stop.
- The transcript appears in the list under All Transcripts within a few seconds. Click any word to jump the audio to that moment.
To record a call, turn on the System audio toggle as well before you press Record. The meeting recording guide walks through that, including the option to be notified whenever a call app opens.
Your first file import
- Choose Transcription > Import File… from the menu bar, or press Command-I.
- Pick an audio or video file. MP3, M4A, WAV, AIFF, FLAC, MP4 and MOV all work; video files have their audio track extracted.
- The file is queued and transcribed in order. You can also drag files straight onto the record bar or onto the empty library area, where the drop zone reads Drop to import.
Several files at once are fine. They are processed one after another so your Mac stays responsive.
Where to go next
- Settings lives in the sidebar, next to Library, and also opens with Command-comma. Its tabs are Transcription, Voice Typing, Vocabulary, Recording, AI & Models, Permissions and About.
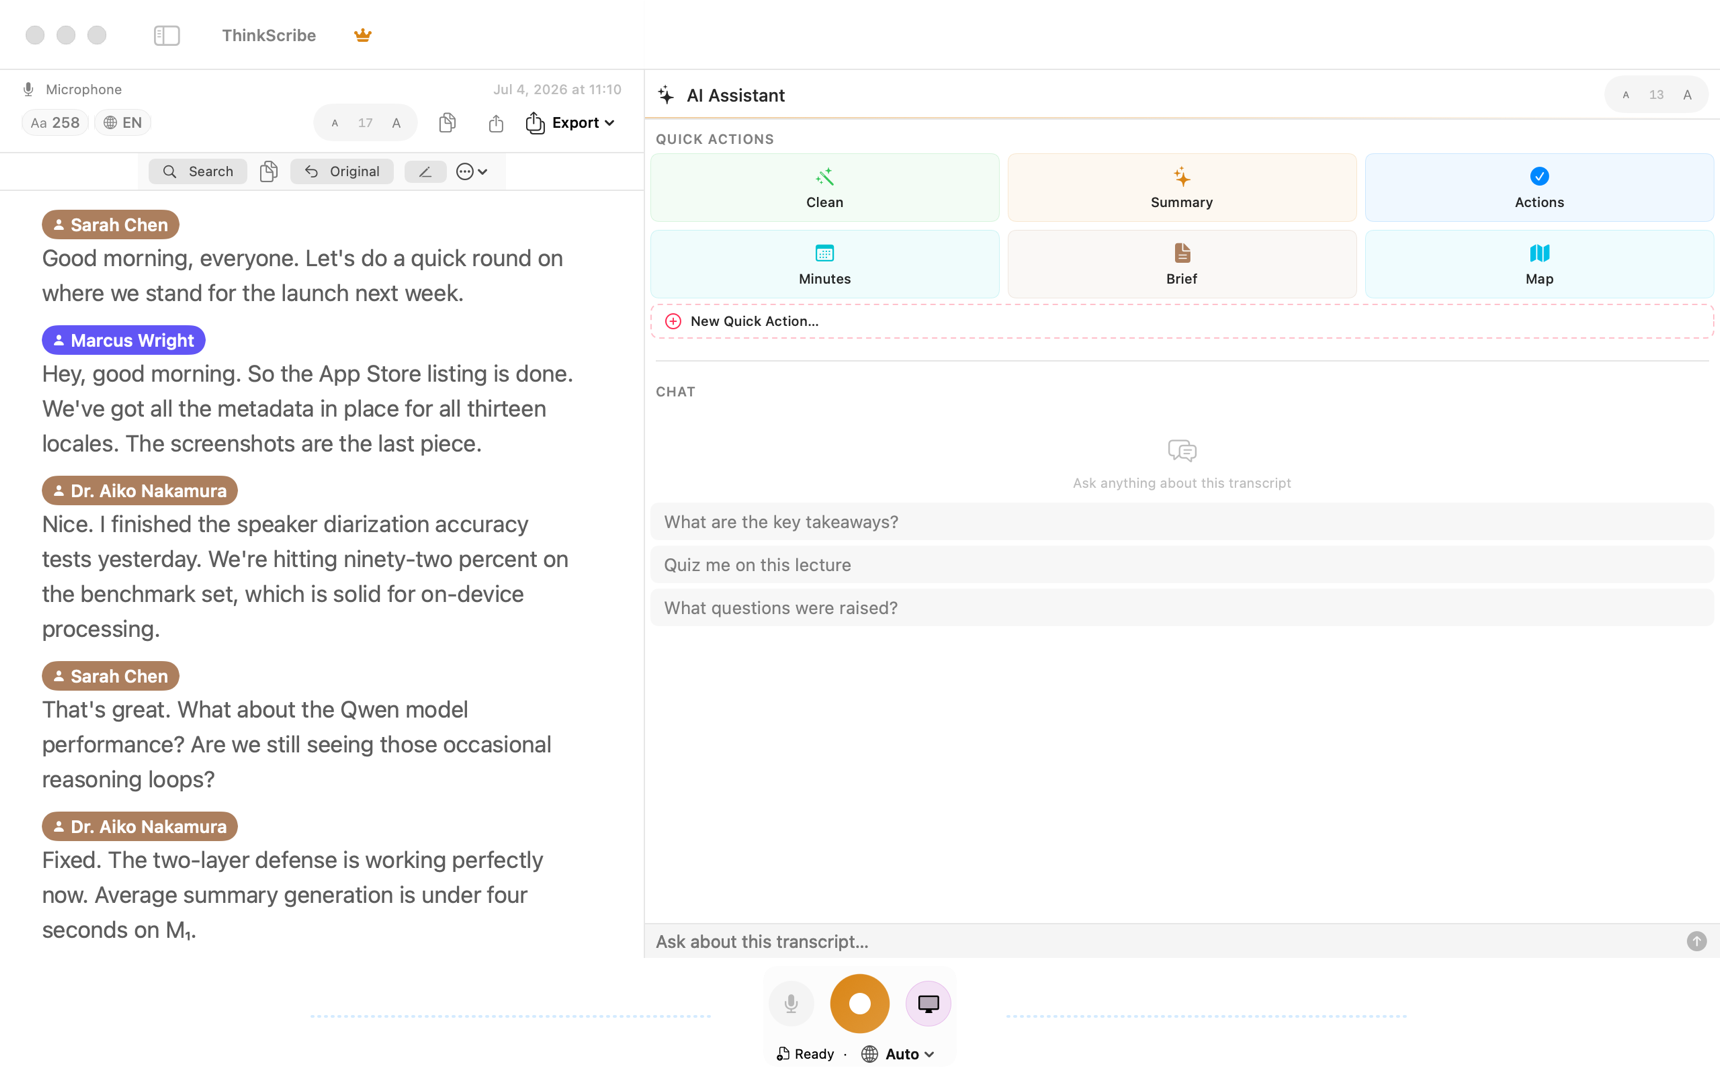
- The AI Assistant panel on the right of any transcript has quick actions for Summarize, Action Items, Meeting Minutes and more. See the AI assistant guide.
- When a transcript shows Speaker 1 and Speaker 2, click a speaker badge to name them. ThinkScribe remembers the voice next time. See teach ThinkScribe who is speaking.
Frequently asked questions
Does transcription on a Mac need an internet connection?
Not if the speech model lives on the machine. ThinkScribe uses a connection only to download the optional speech and AI models the first time; after that, voice typing, transcription, speaker identification and summaries all run on your Mac with the network off. Apple Speech is built into macOS and works immediately with no download at all.
Do I need an account?
No. There is nothing to sign up for and no login. Your purchase is tied to your Apple ID through the App Store, and iCloud sync, if you turn it on, uses your own iCloud account.
Where are my recordings stored?
On your Mac, inside the app's own folder in Application Support. Right-click any transcript in the library and choose More… > Show in Finder to see its audio file. A whole-library backup is available under Settings > About > Backup & Restore.
Can I skip the welcome tour?
Yes. Click Skip Setup on any step. Everything it configures, from permissions to the iCloud choice, is also available in Settings, and you can re-open the tour from Help > Welcome Guide….